Padlet is an easy to use versatile, easy to use tool for fostering collaboration, communication and the development of learning resources. Essentially, it acts as a bulletin board, allowing students to add virtual post-it notes that may include attaching or embedding:
text
images
web links
audio
video
YouTube videos
drawings
documents, etc.
For many years Padlet has been a free tool, but it now operates under a freemium model. The slider below demonstrates 12 different uses of Padlet Walls.
A Backchannel is a live text-based, secondary conversation that happens alongside the main conversation during a conference or lecture presentation. Traditionally, backchannels have always existed in education, in the form of making a comment to the person sitting next to you or passing notes in class during a presentation or activity. With the use of technology these unofficial background conversations are moving out from the shadows to the foreground to engage a much wider audience in a real-time conversation during a live presentation.
Backchannel tools enable learners to make comments, share links, ask questions, reply to questions or to offer different perspectives on a topic without interrupting the speaker. Depending on the tool used for a Backchannel the conversation can be an open public conversation or a private conversation restricted to a specific class. The learning potential and richness of a backchannel is achieved when it is fully integrated into a lecture or presentation, where the speaker stops to review the backchannel and respond to audience questions or comments. When used in this way, the use of a backchannel can actually shape and change the focus of the presentation to personalise it to the needs of the specific audience.
Maintain student attention. Even the best lecturers fail to maintain the full attention of students during lectures or presentations. The use of a Backchannel provides another outlet for engaging students in the topic being discussed rather than what is happening on Facebook.
Making learning and understanding visible. The use of a Backchannel enables students to share their thoughts and understanding anonymously with the group.
Engaging less confident students. Quieter students will never ask a question in a large class environment. The use of a Backchannel gives everyone in the class a voice and enables quieter and less confident students to post anonymous questions or to seek clarification about concepts they do not understand and have those questions answered by their lecturer or peers.
Provides formative feedback to the lecturer. A Backchannel provides immediate feedback to the lecturer regarding whether students are understanding the key concepts being taught and allows them to alter their presentation in real time to address misconceptions.
Extend conversation and disseminate ideas. Backchannels provide an avenue for students to extend the conversation about the issue being discussed in class or to share different perspectives and ideas with a larger group.
Building connections. Backchannels enable students to draw connections between concepts or experiences with those in the class or even remote students who are attending online.
Sharing resources. Backchannels can be used by students to share links to topic related resources.
Students post questions or ask for clarification about things they do not understand. Some tools have voting features that allow students to “vote-up” questions.
Discussion and debate. The lecturer or students can post discussion questions and ask students to contribute to the discussion or debate either in real-time or asynchronously after the class to extend the learning.
Sharing resources. The lecturer or students can post links to web articles, web sites, videos or podcasts related to the topic being discussed.
Brainstorming ideas. Backchannel can be used to collaboratively generate ideas.
Collaborative notetaking. Students can use the Backchannel to take their in-class notes and to amplify key concepts and to benefit from the notes of others, particularly if they miss a key concept.
Fact checking. Ask students to post corrections to any dubious facts they hear during a presentation.
There are a variety of public or private tools that can be used to create a class backchannel. Here are a couple of my favourites.
Twitter
Twitter is a popular tool for creating public backchannels that allows students to make short posts of 140 characters or less. Typically a unique hashtag will be created for a unit, e.g. #EDB115 or for a specific week e.g. #EDB115W2 and shared with the class. Students will need to create a Twitter account to be able to contribute. This does pose an issue as some students will be reluctant to create a social media account and/or post under their real name. Alternatives to this are to ask students to create an account with a pseudonym. The greatest limitation with Twitter is that it is a public forum and you have no control over who contributes or responds to posts. The following video outlines Five tips for creating a Hashtag and demonstrates the process of creating a Twitter hashtag for use as a backchannel.
Backchannel Chat
Backchannel Chat is a free, simple tool that allows you to operate a private Backchannel in your class. As an academic, you will need to sign up for an account by completing a very simple online form. Importantly, it does not require students to sign up for an account. The free version allows students to post comments or questions throughout the class and to like the responses of other students.
As an academic, with the free version, you are able to:
delete student questions or comments
pin specific student questions/comments to the top of the page
view and print a web transcript
view chat statistics.
Two limitations with the free version are that it only allows a maximum of 30 concurrent users and only allows you to create one room/discussion. You can reuse the room/discussion, but will have previous discussions displayed, or alternatively you can delete the previous comments.
An inexpensive paid version for a classroom (currently $15 USD/year) is available that supports 50 concurrent users, allows you to set up unlimited rooms/discussions, provides full transcripts of discussions that can be downloaded in PDF format, has the ability to attach and share files, send private messages to selected participants and allows for personalised avatars.
The following video demonstrates how to use Backchannel Chat.
Google Slides
When Google Slides are being presented, a BackChannel can be established using the Q&A tool and sharing the link with students. During the presentation students are able to ask questions of up to 300 characters in length and to amplify questions by voting them up. The following video demonstrates how the BackChannel operates through Google Slides.
Padlet
Recent updates to Padlet now provide the option of creating a Backchannel using either the Backchannel, Stream or Shelf layout. The Backchannel layout is quite a limited layout as it only allows one-way posting of comments and questions. The Stream layout and Shelf layout enable students to post questions, to respond to posts or questions by other students and to rate posts. The key difference between the Stream and Shelf layouts is the Stream layout only has one stream for a week. In contrast, the Shelf layout allows you to set up a separate stream for each week of a course displayed on the same board. The following video demonstrates the Backchannel features of Padlet.
Echo 360
A number of universities use Echo 360 for recording lectures. The Active Learning platform, which is part of the Echo 360 product now provides you with, amongst other things, the ability to maintain a Backchannel during class.
Word clouds (also known as tag clouds) provide a visual way of representing textual data. Essentially word clouds are a useful tool to help visualise text. They can be used:
to show the Word frequency in a piece of text, (where words or groups of words that are more frequent have a larger font size)
only unique words/ideas generated, or
for decorative purposes, where word frequency is manually controlled by the creator of the word cloud.
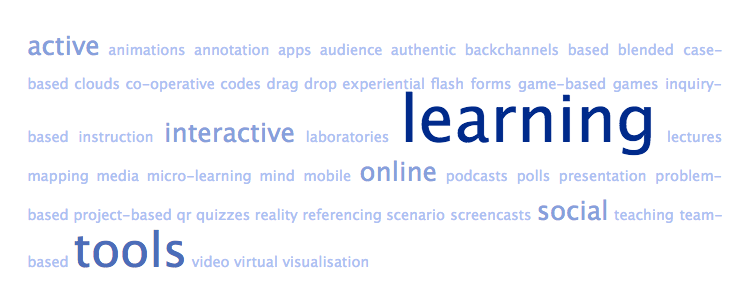
make it easy to identify trends or patterns in text through their ability to clearly visualise word frequencies in a given piece of text. These trends and patterns may be lost in sentences and paragraphs of text or at least, are considerably more difficult to identify.
help you to communicate effectively and make it easier for learners to understand key principles or findings in qualitative research.
are a great way for learners to synthesize, summarize and hone in on the key ideas relating to a topic.
Word clouds can be used as an individual activity or as a collaborative activity.
Visual overview
Use a word cloud to provide an overview of a lecture topic, assessment criteria.
Text analysis
Paste a web based reading or a famous speech into a word cloud to get a text analysis of the key themes. Using a Word Cloud for text analysis is great for studying language, politics, history or communication.
Demonstrate understanding
Learners could create Word Clouds to demonstrate their understanding of a topic and compare their word clouds with others.
Study aid
Learners could put their lecture notes through a word cloud to identify key concepts and themes to assist with assessment preparation.
Compare and Contrast
Learners working in groups could be asked to generate two Word Clouds one that Compare and Contrasts a particular approach. For example, in a music class, learners could be asked to compare and contrast a jazz version and heavy metal version of the same piece of music.
Brainstorming
Individual or collaborative brainstorming, for example, in a business class, learners could create an individual or collaborative word cloud about the traits or qualities of leaders. A law or business class could generate a list of professional ethics, which could then be used as a basis of a class discussion.
Audience response
The lecturer could pose a question and learners add their text response to a collaborative Word Cloud, which can then be shared with the class.
For example, the lecturer could pose a question and learners add their text response to a collaborative Word Cloud, which can then be shared with the class. For example in an Education class learners could asked to contribute to a collaborative word cloud in response to the question What behaviour management strategies suitable for middle school children?
If generating your own list to be added to a Word Cloud use either Word or a text editor to capture your words, just in case something goes wrong with the application. You don’t want to loose all of your great ideas.
The majority of Word Cloud applications treat the spaces between words as separate words, if you have a phrase to be added the tilde key (~) keeps words together as a group. You will need to check this with each tool.
If you want to import your Word Cloud into a slide presentation for projection in a lecture or conference room, ensure that you have good contrast between the foreground and background colours and a clear, readable font to ensure your audience can read it clearly at a distance.
Some word clouds only include words that they can fit in the word cloud, so you need to be aware that not all of your words may be included.
If using a speech or reading for generating a Word Cloud you may opt to switch off the use of small words in the settings.
There is a large range of Word Cloud generators available for use. By far the most common type of word cloud is one that allows an individual to create a word cloud. Collaborative word cloud generators are much rarer but have a lot more potential in lectures and tutorials to enhance student engagement.
Wordle
Wordle is probably one of the earliest tools for creating word clouds and most well-known. In recent years, due to changes to browsers and Java, Mac and increasingly PC users have not been able to use the tool. However, recognising the popularity of the product, the developer of Wordle has now created a free downloadable application for both Mac and PC users.
Once installed the Mac or PC version of Wordle works exactly the same as the old web version. It allows you to create word clouds in a variety of styles, layouts and colours, with the most frequently occurring words being larger and bolder than less frequently occurring words. Through the downloaded app, you are able to print your word cloud or save it as a .PNG file.
The following video demonstrates how to use the downloadable version of the Wordle App to create and customise word clouds.
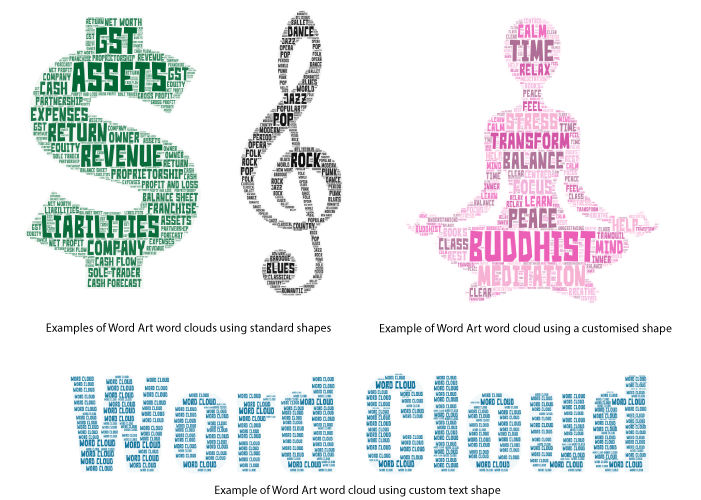
Word Art is an extremely flexible web-based tool for generating word clouds that does not require the creation of an account. Within the application you can change fonts, font size, layouts, shapes, and colours. Additionally, you can upload your own shapes/images or add text to suit your specific project. The limitation is you can only download the low quality png or jpg version of your word cloud. If you need a high quality image you will need to take out a subscription. Word Art is available at: https://wordart.com.
Tag Crowd is a simple to use web-based tool for generating word clouds. It allows you to enter text, a web page URL or upload a file to generate your word cloud. Simply tapping on the visualize button generates your word cloud.
WordItOut is a free web-based tool, which can be accessed through a browser on any device. It allows you to create word clouds from a URL, documents, plain text or tables. You can choose from a variety of colours, fonts, font sizes and layouts. Word Clouds generated can be set as private or public. WordItOut also provides embed code for embedding word clouds in your web site.
WordItOut tries to use as many of your words as possible, but it does discard those that it cannot fit into the word cloud. The only thing that was a bit of a minor irritation for me compared to other word cloud tools is the need to provide an email address to get your word cloud.
Mac, PC, Android, IOS, Windows tablets through a web browser.
Wordsift 2
Wordshift 2 is a web-based tag cloud tool. It provides five cloud styles. Words can be arranged randomly or in alphabetical order, reverse alphabetical order, common to rare or rare to common word usage.
Handbrake is an open source video compression tool for Mac and PCs that allows you to significantly compress video files without loss of quality. In my example, I was able to compress a video with an original file size of 97.1 MB to only 23.6 MB.
The extent of file compression possible through the Handbrake application.
The video below demonstrates how to use the Handbrake application to compress video files.
When creating PowerPoint Presentations we frequently forget to optimise images that we have included in the presentation. This results in a large file size, which may be too large to email or use up unnecessary student download limits. Through the use of the Compress Picture option, it is possible to optimise all images in a presentation at one time.
Using the Compress Picture approach, I compressed an PowerPoint presentation with an original size of 21.9 MB to 3.5 MB, without loss of quality for onscreen viewing.
Reduction in file size possible by using the compress picture option in PowerPoint.
The following video demonstrates the use of the Compress Picture option in PowerPoint. This feature is also available in Microsoft Word.
There are times when you need to be able to compress a PDF file so it can be emailed, uploaded or shared but the file size of your PDF document is too large. Here are some ways you can compress a PDF file.
Adobe Acrobat Professional
If you have access to Adobe Acrobat Professional within your university, PDF files can be compressed with the Reduce File Size option. Using this feature, I was able to compress by PDF file from 15.6 MB to 3.2 MB.
The extent of file compression through Adobe Acrobat Professional.
The following video demonstrates how to compress a PDF using the Reduce File Size feature of Adobe Acrobat Professional.
SmallPDF.Com
SmallPDF.com is a free website that allows you to create and manipulate PDF files. Using this web application I was able to compress my PDF from 15.6 MB to 2.5 MB without any loss of quality.
The extent of file compression through Small PDF.com.
The following video demonstrates how to compress a PDF file using SmallPDF.com.
Images Sliders (also known as image carousels or slideshows) consists of a series of usually between 5 – 10 static slides on a single topic. Slides include strong visuals and limited text and are a great way to introduce new concepts. Image Sliders support the Mayer’s 12 Multimedia Principles by:
• chunking content down to bite sized components
• combining text and appropriate graphics to help communicate key concepts
• allowing the user to control the pace of the presentation.
There are a variety of simple tools that can be used to create image sliders including:
• PowerPoint
• H5P
• Articulate Storyline.
The following is an example of a slider created using H5P that can be embedded into web sites and Learning Management Systems.
This is an example of a slider created using PowerPoint, again this can be embedded into web sites and Learning Management Systems.
In the past, reading online using a computer has been challenging, clumsy and a significantly inferior experience to reading on paper. With the invention and proliferation of mobile devices (phones and tablets), reading online has become a considerably easier, richer and enjoyable experience. eReader Apps on mobile devices have extended the digital reading experience to do things not possible with paper books.
So, why should you consider moving across to eBooks? View this video presentation to find out.
Increasingly, academic staff need to be able to create a variety of learning resources for students in the form of PowerPoint Presentations, Videos, Multimedia Presentations, Handouts or Online Courses. The question is, what can you do to design more effective learning resources to help students learn? Well, Richard Mayer back in 2009 pondered this question and after extensive research, developed the 12 Principles of Multimedia Design. Applying these principles will help you to create more effective learning resources to better support student learning:
Mayer’s 12 Principles of Multimedia Design
Coherence Principle: People learn better when extraneous words, pictures, and sounds are excluded.
Signalling Principle: People learn better when cues, such as headings, bolding keywords, circles, squares, arrows or colour highlight the organisation of essential material.
Redundancy Principle: People learn better from graphics and narration than from graphics, narration, and on-screen text.
Spatial Contiguity Principle: People learn better when corresponding words and pictures are presented near rather than far from each other on the page or screen. The example below demonstrates this principle. Which is easier to understand? Drag the slider to see the full image.
Temporal Contiguity Principle: People learn better when corresponding words and pictures are presented simultaneously rather than successively.
Segmenting Principle: People learn better when a multimedia lesson is presented in a user-paced segment rather than as a continuous unit.
Pre-training Principle: People learn better from a multimedia lesson when they know the names and characteristics of the main concepts.
Modality Principle: People learn better from graphics and narration than from animation and on-screen text.
Multimedia Principle: People learn better from words and pictures than words alone. Try it for yourself. Which example makes it easier to understand the concept? Drag the slider to see the full image.
Personalisation Principle: People learn better from multimedia lessons when words are in a conversational style rather than formal style.
Voice Principle: People learn better when the narration in multimedia lessons is spoken in a friendly human voice than a machine voice. Why don’t you be the judge of this? View the video below, which has two short video extracts. Which version makes it easier to learn and understand?
Image Principle: People do not necessarily learn better from a multimedia lesson when the speaker’s image is added to the lesson.
The old adage that “a picture paints a thousand words” (attributed to a 1911 newspaper article by Arthur Brisbane), still rings true today. As humans we are born with the ability to process pictures and are hardwired to respond to visuals. Our eyes are automatically drawn to visuals first, whereas words tend to run together. This is why Infographics can be a powerful learning tool.
What is an Infographic?
An infographic is a is a highly effective tool for presenting and communicating complex information, knowledge and/or data. Infographics leverage the use of simple graphics, icons, charts, graphs and limit the amount of text, so learners can quickly and clearly understand the key elements.
Tools for creating an Infographic
Infographics can be easily created even if you don’t have graphic design skills. Some of my favorite tools for creating Infographics are:
Piktochart
Piktochart is a free application for designing not only Infographics but also posters, presentations and reports. It comes with a basic library of tools including a variety of:
Backgrounds
Shapes
Lines
Icons
Photos
14 styles of graphs.
Additionally you are able to upload your own images or videos from YouTube or Vimeo.


 Twitter
 Backchannel Chat is a free, simple tool that allows you to operate a private Backchannel in your class. As an academic, you will need to sign up for an account by completing a very simple online form. Importantly, it does not require students to sign up for an account. The free version allows students to post comments or questions throughout the class and to like the responses of other students.
 A number of universities use Echo 360 for recording lectures. The Active Learning platform, which is part of the Echo 360 product now provides you with, amongst other things, the ability to maintain a Backchannel during class.
 What are Word Clouds?
 5 Tips for using Word Clouds
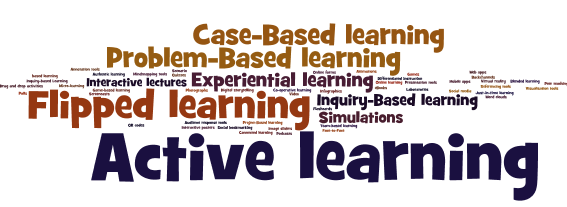


 If you have access to Adobe Acrobat Professional within your university, PDF files can be compressed with the Reduce File Size option. Using this feature, I was able to compress by PDF file from 15.6 MB to 3.2 MB.
 SmallPDF.com